With some patience and a little care, we should be able to install glass tile and ceramic. However, we should have a plan about the proper layout, tile size and color combinations. Once we do this, we need to install the tile carefully, so we can enhance the interior. Before doing this, we need to prepare proper materials and tools. We need pencil, paper pad, 2-inch level, tile cutter, chalk line, one bucket for mixing grout, grout, bucket for clean water, sponges, latex, pre-mix tile adhesive and latex gloves. Before starting a house-wide project, we should experiment with small parts of our house. As an example, hidden parts of the back porch that are covered with potted plants are good candidates.
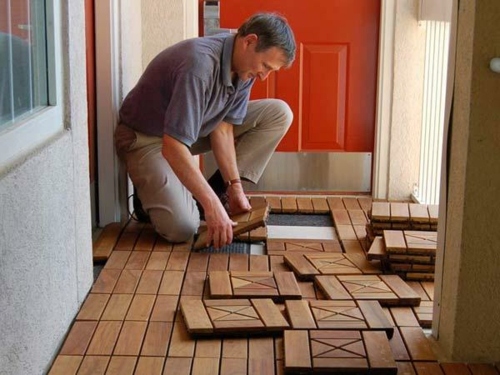
We should start by using a pencil and pad to sketch the surface that we are going to apply. We should make sure that it will fit with the dimension of tiles. Measurements should be accurate to the millimetres, so we won’t need to cut and waste tiles unnecessarily. If we are confident enough, we may break small tiles to create specific designs of our own. We should begin by dry laying tiles on the surface. We should start from the most visible part of the porch, such as the edge to the wall. We should use our 2-inch level as the straightedge and make perfect lines on the surface. Once we have placed the first few lines; we should make sure that the lines are still straight. Tops of the tiles should be even and level. There should be identical spaces between all sides of the tiles.
We may also use plastic spacers with different widths for the grout spaces. Experienced tile layers don’t need plastic spacers, but for homeowners with their first DIY project, spacers are essential to obtain consistent results. With spacers, we can easily move tiles around and we still get spaces with uniform widths. We could use small spackle knife to remove any kind of adhesive that we may accidentally spread to some areas. Also, we should return excess adhesive to its bucket; only if it is clean. Adhesive is contaminated quite easily and it is impossible to remove dirt and small debris that get into the bucket. Whatever we do, we should focus on our first tile, because it will affect how dozens or even hundreds of other tiles are laid.
After we have laid all tiles evenly with uniform space for grout, we can start the grouting phase. Grout comes in non-sanded and sanded types. We could use sanded grout for bigger grout joints, like floors. Non-sanded grout is more useful for countertops and walls. Grout should be mixed in a small paper bucket and it is available in local hardware or paint stores. It is a disposable bucket and can be thrown away after we complete the grouting process. Grout is available in multiple colors and we choose the one that match our tiles. White grout is good for bathroom, while non-bathroom areas may use darker grouts.